AI Kit on a Raspberry Pi 5: setup and running Computer Vision Pipelines
Сomplete guide for running CV on Raspberry Pi AI Kit with Hailo-8L chip.

What is Raspberry Pi 5 and AI Kit?
Raspberry Pi 5 (RPi5) is an affordable one-board computer used in a various IoT tasks and projects, such as aerospace research, industrial computers, servers, and network hubs. It can also be used as a hosting platform and it's a great foundation for non-commercial projects.
Despite RPi5's flexibility, when it comes to running AI models, the RPi5 VideoCore VII GPU lacks the processing power for complex computations since it's not optimized for parallel processing typically used in neural network operations.
The Raspberry Pi AI Kit is an accelerator module for the RPi5 developed by Hailo for running AI models. It consists of a Raspberry Pi M.2 HAT+ and a Hailo AI module powered by a 13 tera-operations per second (TOPS) Hailo-8L processor. The idea of the AI Kit is to provide real-time AI inferencing while being cost- and energy-efficient.
Who uses Hailo and why?
The key strength of Hailo-8L is that it is the most affordable yet powerful among its competitors. Compared to common alternatives like the Nvidia Jetson Series or Coral USB Accelerator, the Hailo-8L offers way more performance for the price in running neural networks.
| Feature | Hailo-8L (AI Kit + RPi5) | Jetson Nano Dev Kit | Jetson Xavier NX Dev Kit | Coral USB Accelerator (with RPi4) |
Price | $150 | $299 | $629 | $130 |
AI Performance | 13 TOPS | 0.472 TOPS | 21 TOPS | 4 TOPS |
Supported OS | Linux, Windows | Jetson Linux | Ubuntu Linux x64 | Debian Linux |
RAM | 8 GB (RPI5) | 4 GB | 8 GB | 4 GB (RPI4) |
ResNet50 v1 | 133 FPS | 37 FPS | 740 FPS | 19 FPS |
Mobilenet v2 | 189 FPS | 64 FPS | — | 130 FPS |
SSD Mobilenet v2 | 108 FPS | 39 FPS | — | 48 FPS |
SSD Mobilenet v1 | 356 FPS | 42 FPS | 804 FPS | 67 FPS |
Sources: Hailo Model Explorer, Jetson benchmark, Jetson and Coral benchmark, Coral benchmark.
AI Kit features the PCIe connector between RPi5 and Hailo chip, which provides low-latency data transfer. Hailo also provides its own Dataflow Compiler, which allows the translation of the models from standard ML frameworks to Hailo executable format. Models compiled for Hailo are not only optimized specifically to chip architecture but also use quantization-aware training, which allows shrinking models in size while maintaining performance.
Due to Hailo's advanced capabilities in handling complex computational tasks, the Hailo AI accelerator has been adopted across multiple fields, such as automotive systems, industrial automation, healthcare, retail analytics, and security applications.
As you will see further, AI Kit installation and usage is extremely straightforward, but if you have any questions, the chip developers will help you in the Hailo Community.
With all this said, let's proceed to the complete guide on running some Computer Vision on Raspberry.
Hardware setup
Required hardware:
- Raspberry Pi 5.
- Raspberry Pi AI Kit.
- MicroSD Card with Raspberry Pi OS. Use the official imager to install it. To connect with SSH, see advanced options.
- USB Type-C power supply.
- Optional: Raspberry Pi Camera Module 3.
- Optional: digital or analog screen.
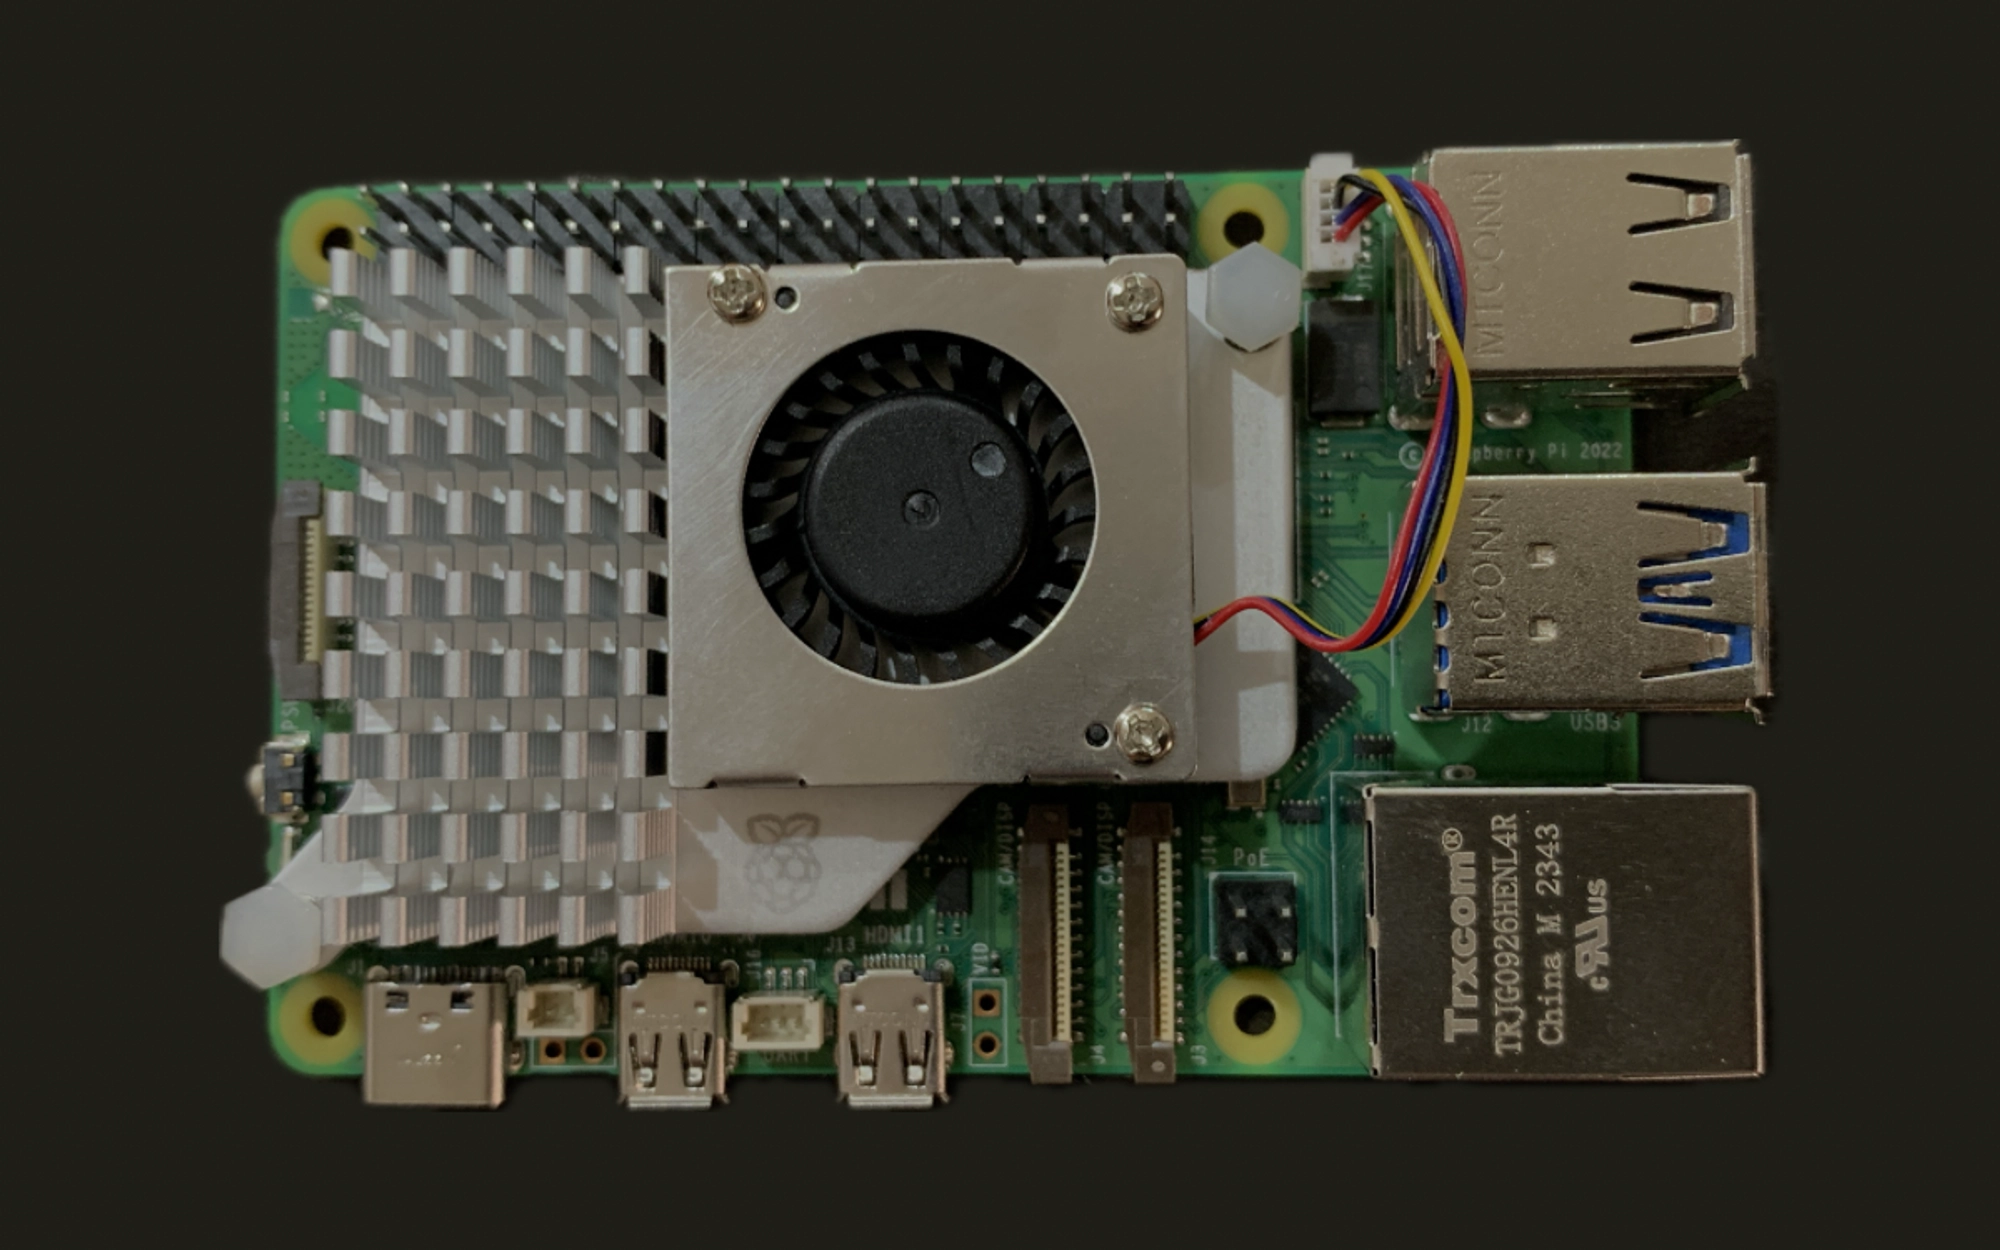
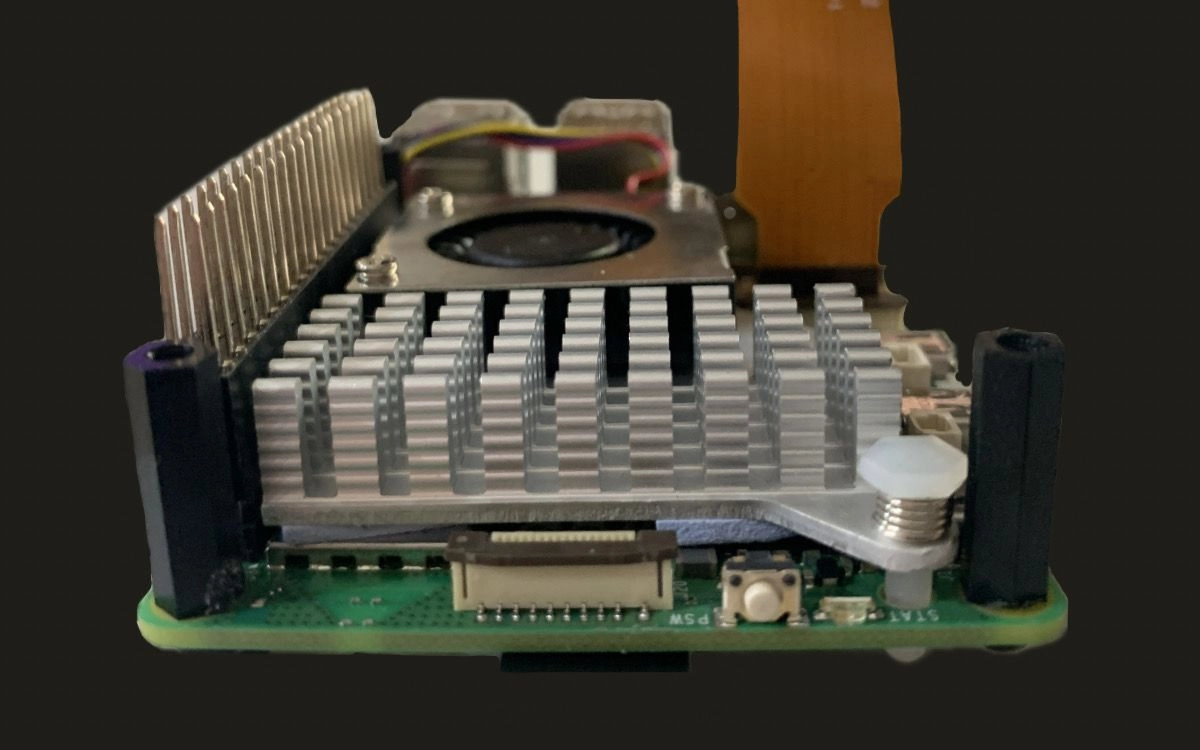
Step 1: Install the cooling system. Without cooling, the base RPi5 board will overheat when using the AI Kit.
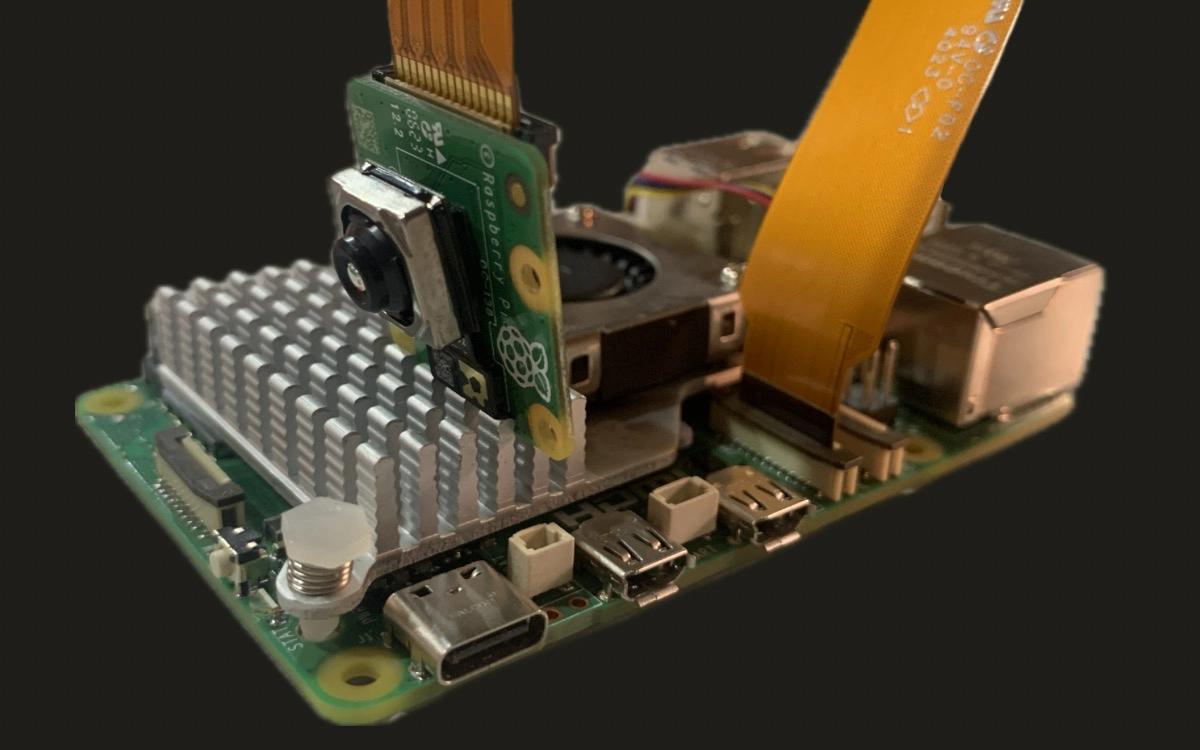
Step 2 (Optional): Install the Raspberry Pi Camera Module 3 into either of two 4-lane MIPI camera/display transceivers.
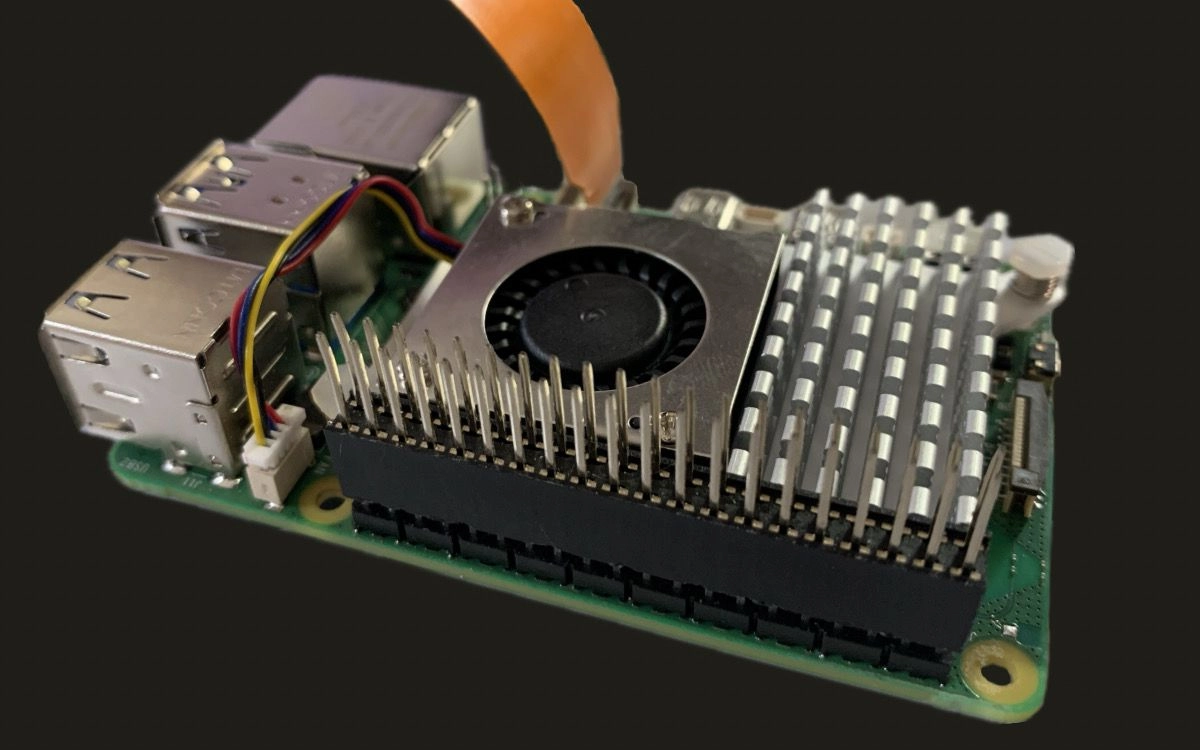
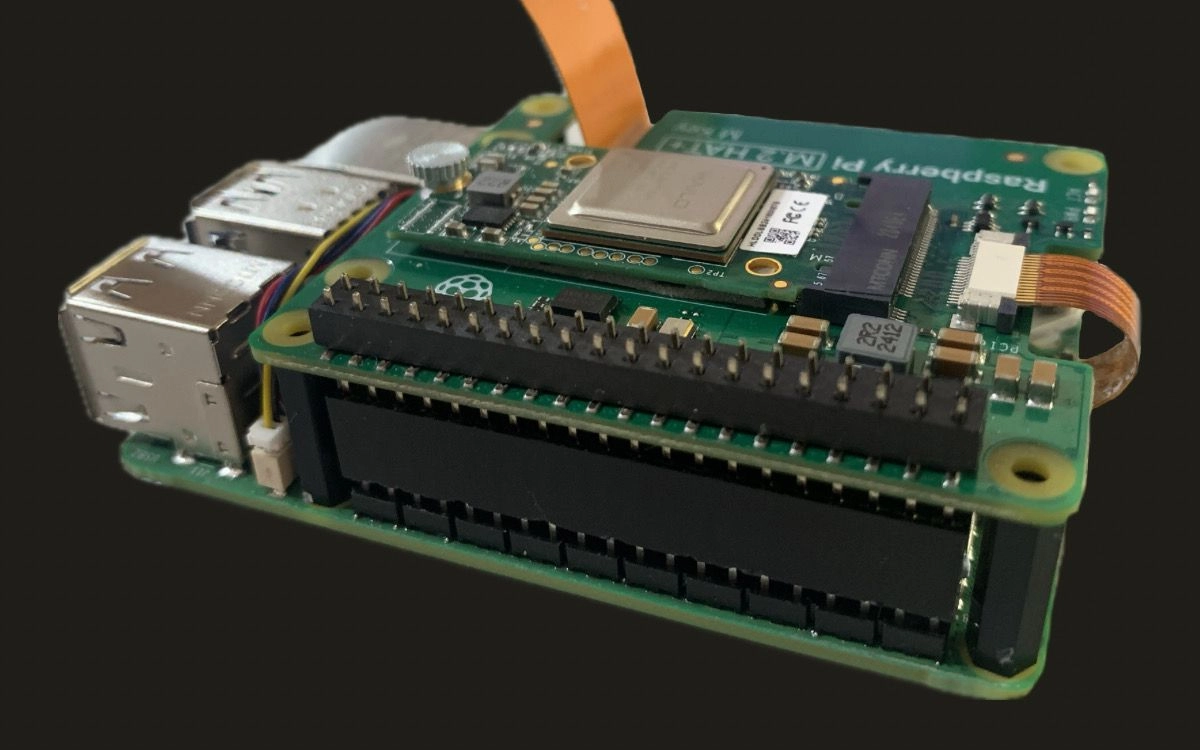
Step 3: Press the GPIO stacking header on top of the Raspberry Pi GPIO pins. Its orientation doesn't matter.
Step 4: Install the spacers on four provided screws inserted from the bottom side. Use the bigger ones.
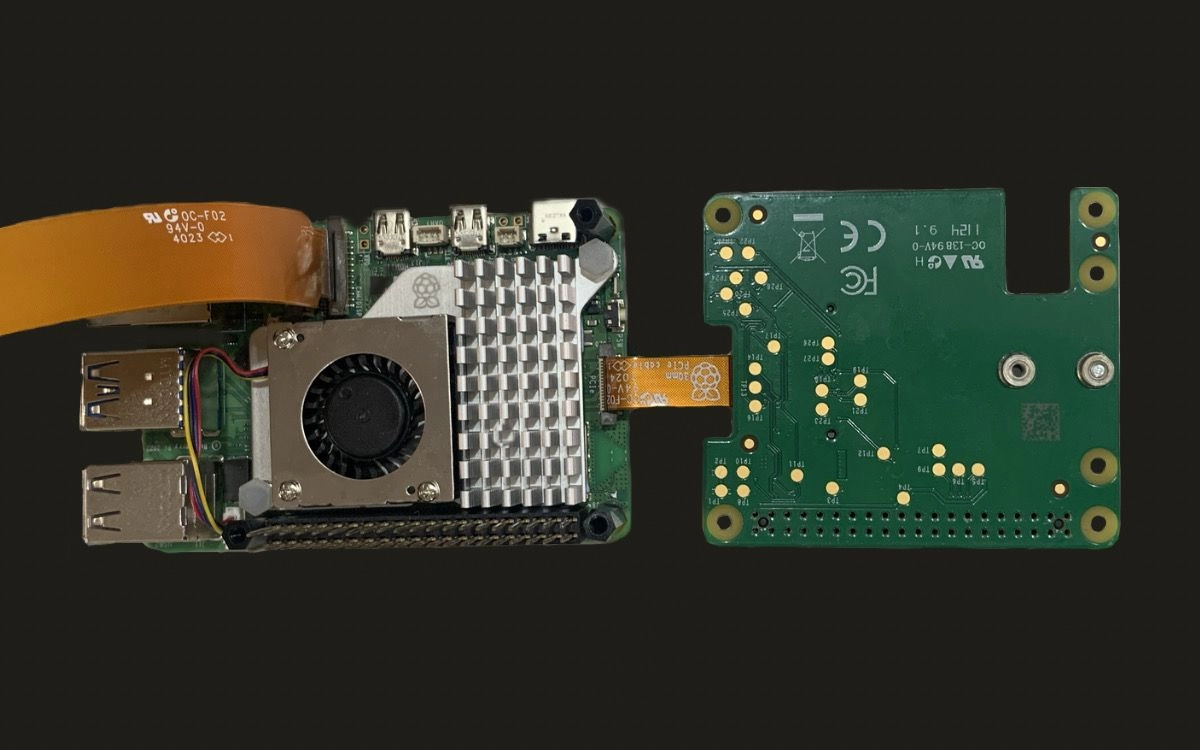
Step 5: Insert the PCIe cable into the PCIe port of your RPi, then secure it by pressing down the cable holder from both sides.
Step 6: Set the AI Kit on top of the spacers.

Step 7: Use the four remaining screws to secure AI Kit in place.
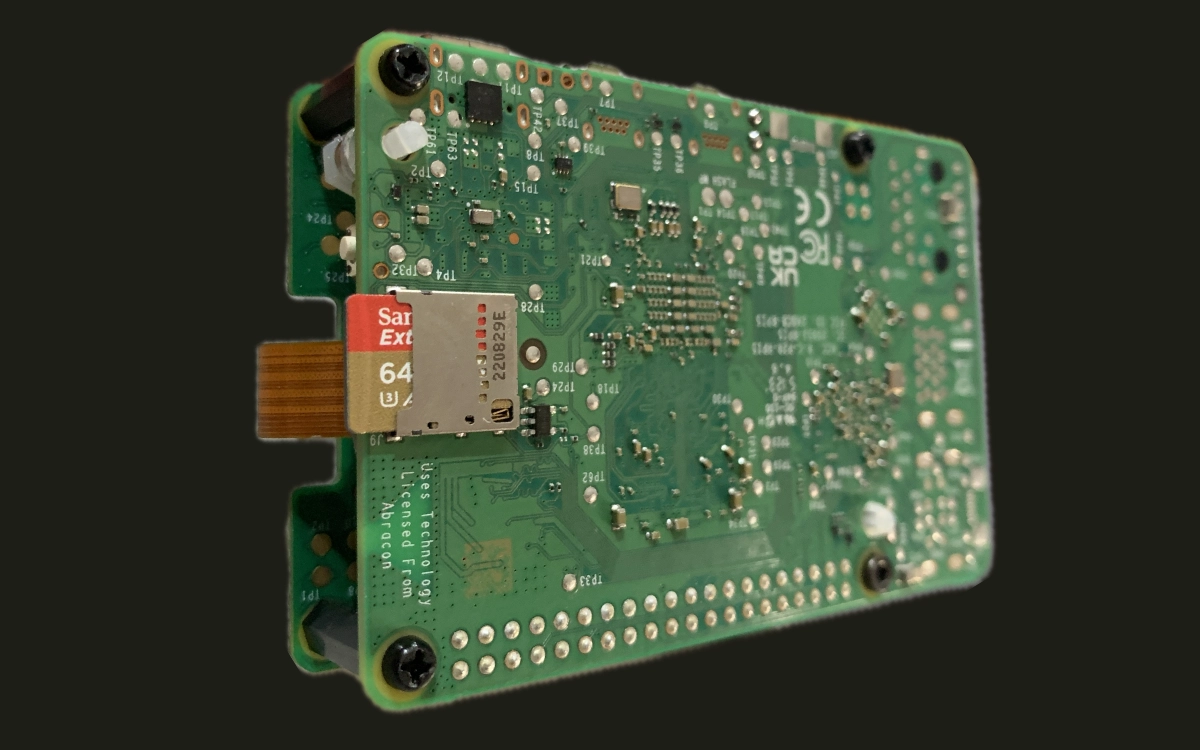
Step 8: Insert the microSD Card with Raspberry Pi OS into the microSD Card socket.
Congrats, your hardware setup is completed!
Software setup
After the installation of the AI Kit, connect to your device using SSH (see the official guide) and run the script to update the firmware on your RPi5:
sudo apt update && sudo apt full-upgrade
sudo rpi-eeprom-update
Execute the command to initiate the Raspberry Pi Configuration CLI. If it's not working, make sure you're using the 6 December 2023 or later version of firmware:
sudo raspi-config
In 6 Advanced Options > A5 Bootloader Version, choose E1 Latest and accept the Bootloader reset. Then <Finish> and reboot.
Update the Bootloader:
sudo rpi-eeprom-update -a
sudo reboot
Open the Raspberry Pi Configuration again:
sudo raspi-config
Select 6 Advanced Options > A8 PCIe Speed. Choose <Yes> to enable PCIe Gen 3 mode. Then <Finish> and reboot.
Install the Hailo SDK for the AI Kit and GStreamer plugins:
sudo apt install hailo-all
sudo apt-get install gstreamer1.0-plugins-ugly
sudo reboot
Now check if the system recognizes the Hailo chip:
hailortcli fw-control identify
If everything is functional, it should output something like this:
Executing on device: 0000:01:00.0
Identifying board
Control Protocol Version: 2
Firmware Version: 4.17.0 (release, app, extended context switch buffer)
Logger Version: 0
Board Name: Hailo-8
Device Architecture: HAILO8L
Serial Number: ...
Part Number: ...
Product Name: HAILO-8L AI ACC M.2 B+M KEY MODULE EXT TMP
Run this command to check the TAPPAS Core is installed. To check Hailotools:
gst-inspect-1.0 hailotools
If everything is set up correctly the output should look like this:
Plugin Details:
Name                     hailotools
Description              hailo tools plugin
Filename                 /lib/aarch64-linux-gnu/gstreamer-1.0/libgsthailotools.so
Version                  3.28.2
License                  unknown
Source module            gst-hailo-tools
Binary package           gst-hailo-tools
Origin URL               https://hailo.ai/
hailoaggregator: hailoaggregator - Cascading
hailocounter: hailocounter - postprocessing element
hailocropper: hailocropper
hailoexportfile: hailoexportfile - export element
hailoexportzmq: hailoexportzmq - export element
hailofilter: hailofilter - postprocessing element
hailogallery: Hailo gallery element
hailograytonv12: hailograytonv12 - postprocessing element
hailoimportzmq: hailoimportzmq - import element
hailomuxer: Muxer pipeline merging
hailonv12togray: hailonv12togray - postprocessing element
hailonvalve: HailoNValve element
To check Hailonet:
gst-inspect-1.0 hailo
The output should look like this:
Plugin Details:
Name                     hailo
Description              hailo gstreamer plugin
Filename                 /lib/aarch64-linux-gnu/gstreamer-1.0/libgsthailo.so
Version                  1.0
License                  unknown
Source module            hailo
Binary package           GStreamer
Origin URL               http://gstreamer.net/

hailodevicestats: hailodevicestats element
hailonet: hailonet element
synchailonet: sync hailonet element

3 features:
+-- 3 elements
If anything went wrong, see the Hailo PCIe troubleshooting.
If you want to use a monitor to see the video processing results, connect your screen to the RPi5’s micro-HDMI port. Normally, you will see the Raspberry Desktop on your monitor right away, but if not, try to manually сonfigure the streaming desktop:
sudo nano /boot/firmware/config.txt
Add this line to the end of the file to enable monitor usage:
hdmi_force_hotplug=1
If your display needs a more robust signal, you can add the config_hdmi_boost number up to 9. For example:
config_hdmi_boost=4
If you are using a digital monitor, add:
hdmi_group=1
If you are using an analog monitor, add:
hdmi_group=2
Then reboot. If you still can't see the Raspberry Desktop:
- Open your
config.txtfile and search forhdmi_safe=1. If this line is present — remove it. - Make sure your power supply delivers 1A and not 500mA.
- Using a shorter or better-quality HDMI cable might help as well.
Running basic Computer Vision
Now, let's run the basic Computer Vision pipelines provided by Hailo. Firstly, clone the official Hailo Raspberry Pi 5 Examples repository:
git clone https://github.com/hailo-ai/hailo-rpi5-examples.git
cd hailo-rpi5-examples
git checkout 0c70ac5
Configure environment:
source setup_env.sh
pip install -r requirements.txt
./download_resources.sh
export DISPLAY=:0
If you reboot your RPi5, you have to repeat these steps:
cd hailo-rpi5-examples
source setup_env.sh
export DISPLAY=:0
The repository you've cloned contains the 3 pipelines that can process the video from the downloaded resources:
detection.py— performs object detection withyolov6nmodel by default, and also supportsyolov8sandyolox_s_leakymodels.pose_estimation.py— performs human pose estimation withyolov8s_posemodel.instance_segmentation.py— performs instance segmentation withyolov5n_smodel.
Let's try the detection pipeline:
python basic_pipelines/detection.py --input resources/detection0.mp4
Now, you can see the processed video with detection bounding boxes on your screen:
Detection Pipeline Output Example
The other two pipelines can be run in the same way:
python basic_pipelines/pose_estimation.py --input resources/detection0.mp4
python basic_pipelines/instance_segmentation.py --input resources/detection0.mp4
Let's make a few changes in the code so we can save the pipeline output as a video file. The update is the same for all 3 pipelines, but we will demonstrate using detection.py. Open the pipeline with nano:
nano basic_pipelines/detection.py
Add this line to the beginning of the __init__() method of the GStreamerDetectionApp class (GStreamerPoseEstimationApp or GStreamerInstanceSegmentationApp in the other pipelines):
self.saving = args.save
Then, change the end of the get_pipeline_string() method starting after pipeline_string += f"videoconvert n-threads=3 qos=false ! ":
        pipeline_string += f"videoconvert n-threads=3 qos=false ! "
        if self.saving is None:
            pipeline_string += QUEUE("queue_hailo_display")
            pipeline_string += f"fpsdisplaysink video-sink={self.video_sink} name=hailo_display sync={self.sync} text-overlay={self.options_menu.show_fps} signal-fps-measurements=true "
        else:
            pipeline_string += (
                f"{QUEUE('queue_save')} "
                "videoconvert ! "
                "x264enc bitrate=6000 speed-preset=ultrafast tune=zerolatency ! "
                "matroskamux ! "
                f"filesink location={self.saving} "
            )
        print(pipeline_string)
        return pipeline_string
And add this line to __main__() function after parser = get_default_parser():
parser.add_argument("--save", type=str, default=None, help="Directory to save video to file (default: not saving)")
To run the script with --save argument set to the output file directory in .mkv format:
python basic_pipelines/detection.py --input resources/detection0.mp4 --save "./output.mkv"
To play the result on the screen, run:
sudo apt-get update
sudo apt-get install vlc
vlc output.mkv
Running Computer Vision with Raspberry Pi Camera Module 3
To run any pipeline on the Raspberry Pi Camera Module 3 video stream, set the --input argument with the rpi. For example:
python basic_pipelines/detection.py --input rpi
If the default example throws an error, you have to make a small change in the source_element of the main GStreamer App class. The update is the same for all 3 basic pipelines, but we will use the detection.py for the instance. Firstly, open the pipeline file with nano:
nano basic_pipelines/detection.py
Search for the GStreamerDetectionApp (GStreamerPoseEstimationApp or GStreamerInstanceSegmentationApp in the other pipelines) and rewrite the auto-focus-mode parameter for the source_element in the get_pipeline_string() method:
    if (self.source_type == "rpi"):
        source_element = f"libcamerasrc name=src_0 auto-focus-mode=AfModeManual ! "
Then save and run an updated script:
python basic_pipelines/detection.py --input rpi
Now, you can see the real-time processing video from your camera with detection bounding boxes on your screen.
As simple as that! Now, let's make our own custom pipeline.
Implementing custom Detection-Tracking Pipeline
The main issue with the basic instance_segmentation.py is that if the model loses the detected object — it’s gone for good. In practice, the YOLO's confidence is highly dependent on many factors, like brightness and field of view, especially if the object is too close. This makes the model’s predictions unstable and can fail at the most crucial moment.
To address this issue, we’ve developed a Detection-Tracking algorithm as an extension for the default Instance Segmentation Pipeline. The algorithm tracks objects detected by YOLO and saves the detection regions. Then, if any object is lost, the algorithm finds and matches ORB keypoints between the previous and current frames using Lucas-Kanade optical flow. Thus, you are still tracking the object, even if the YOLO can’t find it on the video.
The essential components of our pipeline are:
- GStreamer app that defines the GStreamer pipeline string and utilizes the model.
- App callback class that allows the storage of data in each frame.
- The custom callback function is usually required for user-defined post-processing, which, in our case, is object tracking.
The full version of the code can be found on our public GitHub repository, along with the README.md and the explanatory comments in the code. However, now you can just clone it:
git clone --recursive https://github.com/dataroot/hailo-rpi5.git
The repository already has the hailo-rpi5-examples as a submodule, so to set up the environment, you can run the following commands:
cd hailo-rpi5/hailo-rpi5-examples
source setup_env.sh
pip install -r requirements.txt
./download_resources.sh
export DISPLAY=:0
cd ..
The pipeline takes the video stream from the camera and applies Detection-Tracker in real-time. To run it:
python custom_pipeline.py
Now you can see the processed video stream from your camera. The colored bounding boxes and instance segmentations are the same as in the default Instance Segmentation Pipeline. However, when the YOLO loses the object, it's still tracked by the Detection-Tracking algorithm. The tracked objects are in the white bounding boxes on the video:
Detection-Tracking Pipeline Output Example when the object is at an unusual angle
Detection-Tracking Pipeline Output Example when the object is too close
If you want to save the processed video, set the --save argument to the output file directory with .mkv extension:
python custom_pipeline.py --save "directory/to/file.mkv"
If you are a code nerd, here is a brief description of the main functions and classes of the custom_pipeline.py for you:
app_callback()— the function that processes every frame and updates the user data with the latest detection and tracking results.UserAppCallbackClass— a user-defined callback class that extends the functionality of theapp_callback_class. This class includes additional attributes for tracking the previously detected but subsequently lost object.GStreamerTrackingApp— a specialized GStreamer application for instance segmentation using YOLOv5 and object tracking. This class also handles the video-stream from the RPi camera module and visualizes the post-processing.track_object()— this function tracks the previously detected object on the current frame by calculating the Lucas-Kanade optical flow between the previous region of interest (ROI) and the current one. To draw a bounding box for the tracked object, we useHailoDetection, which allows us to add this step to post-processing visualization.
Hailo Limitations on Custom Models Inference with Python
Currently, Hailo RPi5 Examples allow inferencing only models provided by Hailo. You can retrain and run them in the same way. However, if you try to use your own models in these pipelines, it won’t work. The issue is that you cannot write a custom postprocessing function that prepares the output tensors for user callback in Python since Tappas postprocessing is only available in C++.
As Hailo developers say, the Python API for Tappas will likely be released in August, enabling custom models inference in Python. As soon as the API is available, we will provide a new guide for inferencing retrained Hailo models along with compiling and running the custom ones. Keep on track with us to stay tuned.


Author